
Virtualization Manager 7 has just been released – Analyze the Past, Fix the Present, Prepare for the Future
It’s pretty epic with some great new features, but I’m going to concentrate on the deployment of the virtual appliance (vApp) itself.
As any reader of mine knows, I’m a big fan (here “fanatic” is accurate) of PowerShell. I’ve also been very pleased with the progress that Hyper-V has made in the recent years, so that’s how I’m deploying this vApp.
First I need a name for the virtual machine.
Next I need to get the link to the download itself. If you are an existing customer, this is found in your customer portal.
We’ll also need a name for the virtual machine.
I need to define a space on my server where I’ll hold the files after download. I almost always refer to this as my scratch space.
#region Varaible Setup
$VMName = "NOCDOCSVMAN01v" # What do you want to call the new VM?
$vAppUrl = "http://put.your.download.link/here.zip" # Get this link from your customer portal.
#endregion Variable Setup

# Select a scratch location
$ScratchDir = "D:\Scratch"
Next we need to download the bits themselves. For this I use Bits Transfer. A note on Bits Transfer – it cannot be used in a non-interactive shell. So, I do this work directly on the server. You can use other ways, but I personally prefer this one. Oh – we also need to tell it where to save…
# Temporary Download Location
$OutputPath = Join-Path -Path $ScratchDir -ChildPath $vAppUrl.Split("/")[-1]

# Run the download
Start-BitsTransfer -Source $vAppUrl -Destination $OutputPath

$OutputPath = Get-Item -Path $OutputPath
Now that we’ve got the bits we need to expand them. This is easy with Expand-Archive, which ships with PowerShell 5.0 and is part of Windows 2016. If you don’t have this, you’ll need to either install PowerShell 5.0 (nice!) or use the Shell ComObject to expand the Zip (ugly, but effective). Here, I’m taking advantage of everything that the new Windows Server offers.
# Expand-Archive is provided by PowerShell 5.0
# - Native on Windows 2016
# - needs to be installed on Windows 2012 R2
$OutputPath | Expand-Archive -DestinationPath $OutputPath.FullName.Replace($OutputPath.Extension, '') -Force
$VHDPath   = Join-Path -Path $OutputPath.FullName.Replace($OutputPath.Extension, '') -ChildPath "Virtual Hard Disks"
Next, I need the paths to the existing system and data drives from the virtual machine. I just use a little Get-Item goodness to get this.
I’ll also need to know where to store these files for the hypervisor, so I ask… nicely… with Get-VMHost.
# Get the paths to the Data and System VHDs
$DataVhd   = Get-Item -Path ( Join-Path -Path $VHDPath -ChildPath "data.vhd" )
$SystemVhd = Get-Item -Path ( Join-Path -Path $VHDPath -ChildPath "system.vhd" )

# Where does the Hyper-V Host keep the Virtual Hard Disk files
$VHDxPath = Get-VMHost | Select-Object -ExpandProperty VirtualHardDiskPath
Now I convert the VHDs to VHDXs. Why? Because Microsoft recommends it for *NIX-based machines.
You may ask yourself, “Self, why doesn’t SolarWinds provide these drives in this format out of the gate?”
I’ll answer that for you: backward compatibility. The way that these bits are shipped “will just work” pretty much in any version of Hyper-V since it’s inception – so it’s better for all parties.
Enough banter – let’s convert!
#region Convert the Virtual Hard Disks
# The most important thing here is the "BlockSizeBytes" which is non-standard for Windows Machines, but *is* standard for *NIX machines
Convert-VHD -Path $DataVHD   -DestinationPath ( Join-Path -Path $VHDxPath -ChildPath ( "$( $VMName )_$( $DataVHD.BaseName ).vhdx" ) ) -BlockSizeBytes 1MB
Convert-VHD -Path $SystemVHD -DestinationPath ( Join-Path -Path $VHDxPath -ChildPath ( "$( $VMName )_$( $SystemVHD.BaseName ).vhdx" ) ) -BlockSizeBytes 1MB
#endregion Convert the Virtual Hard Disks
Yay! Now we have the drives converted to VHDx format, tagged with the VM’s name, and stored in their proper place. Now that we have all the building blocks, we’re ready to actually build the Virtual Machine.
#region Build the VM
# Specs:
# - Version:    5.0  - Base Level for Server 2012 R2
# - Generation: 1    - Traditional BIOS Boot
# - Processors: 2    - From VM's XML
# - Memory:     8 GB - From VM's XML
# - VLAN:       300  - this is specific for my environment
# - Boot Order: IDE  - Start with IDE - everything else is gravy
$VM = New-VM -Version 5.0 -Generation 1 -Name $VMName -NoVHD -SwitchName ( Get-VMSwitch | Select-Object -ExpandProperty Name ) -MemoryStartupBytes 8GB
$VM | Get-VMDvdDrive | Set-VMDvdDrive -ToControllerNumber 0 -ToControllerLocation 1
$VM | Add-VMHardDiskDrive -ControllerType IDE -ControllerNumber 0 -ControllerLocation 0 -Path ( Join-Path -Path $VHDxPath -ChildPath ( "$( $VMName )_$( $SystemVHD.BaseName ).vhdx" ) )
$VM | Add-VMHardDiskDrive -ControllerType IDE -ControllerNumber 1 -ControllerLocation 0 -Path ( Join-Path -Path $VHDxPath -ChildPath ( "$( $VMName )_$( $DataVHD.BaseName ).vhdx" ) )
$VM | Set-VMProcessor -Count 2
$VM | Get-VMNetworkAdapter | Set-VMNetworkAdapterVlan -Access -VlanId 300
$VM | Get-VMBios | Set-VMBios -StartupOrder IDE, CD, LegacyNetworkAdapter, Floppy
#endregion Build the VM
This is an intense block, so I’ve tried to comment it out pretty well. In summary, it builds the VM, moves the DVD-ROM Drive, assigns the new drives, sets the processor and memory count, sets the VLAN for the virtual NIC, and finally sets the boot order.
It’s ready to go! Cross fingers & turn it on.
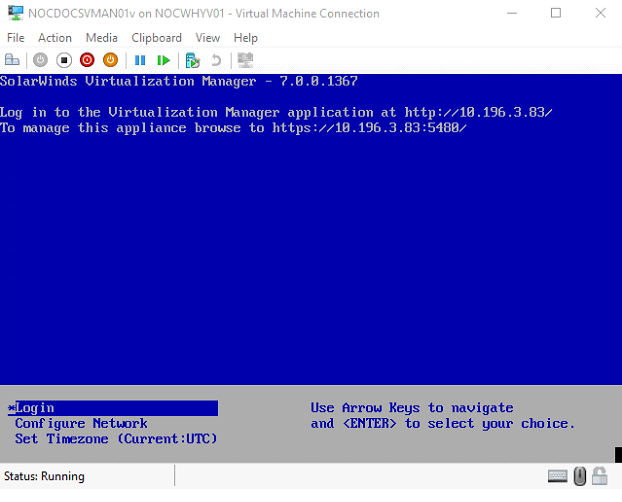
Now that it’s up and running, you can feel free to get crazy and install the Linux Integration Services or maybe the SolarWinds Orion Agent.
Now that the vApp is deployed, we need to integrate it with the rest of your SolarWinds Orion infrastructure, but that’s for another post.